Showing posts with label Mini Quilt. Show all posts

Saturday, 1 February 2014

Mum at Sixtyish

In April 2012 I made dad a quilt for his 60th Birthday, I always intended to make Mum and accompanying quilt for her birthday that November but life got in the way and I never actually did.

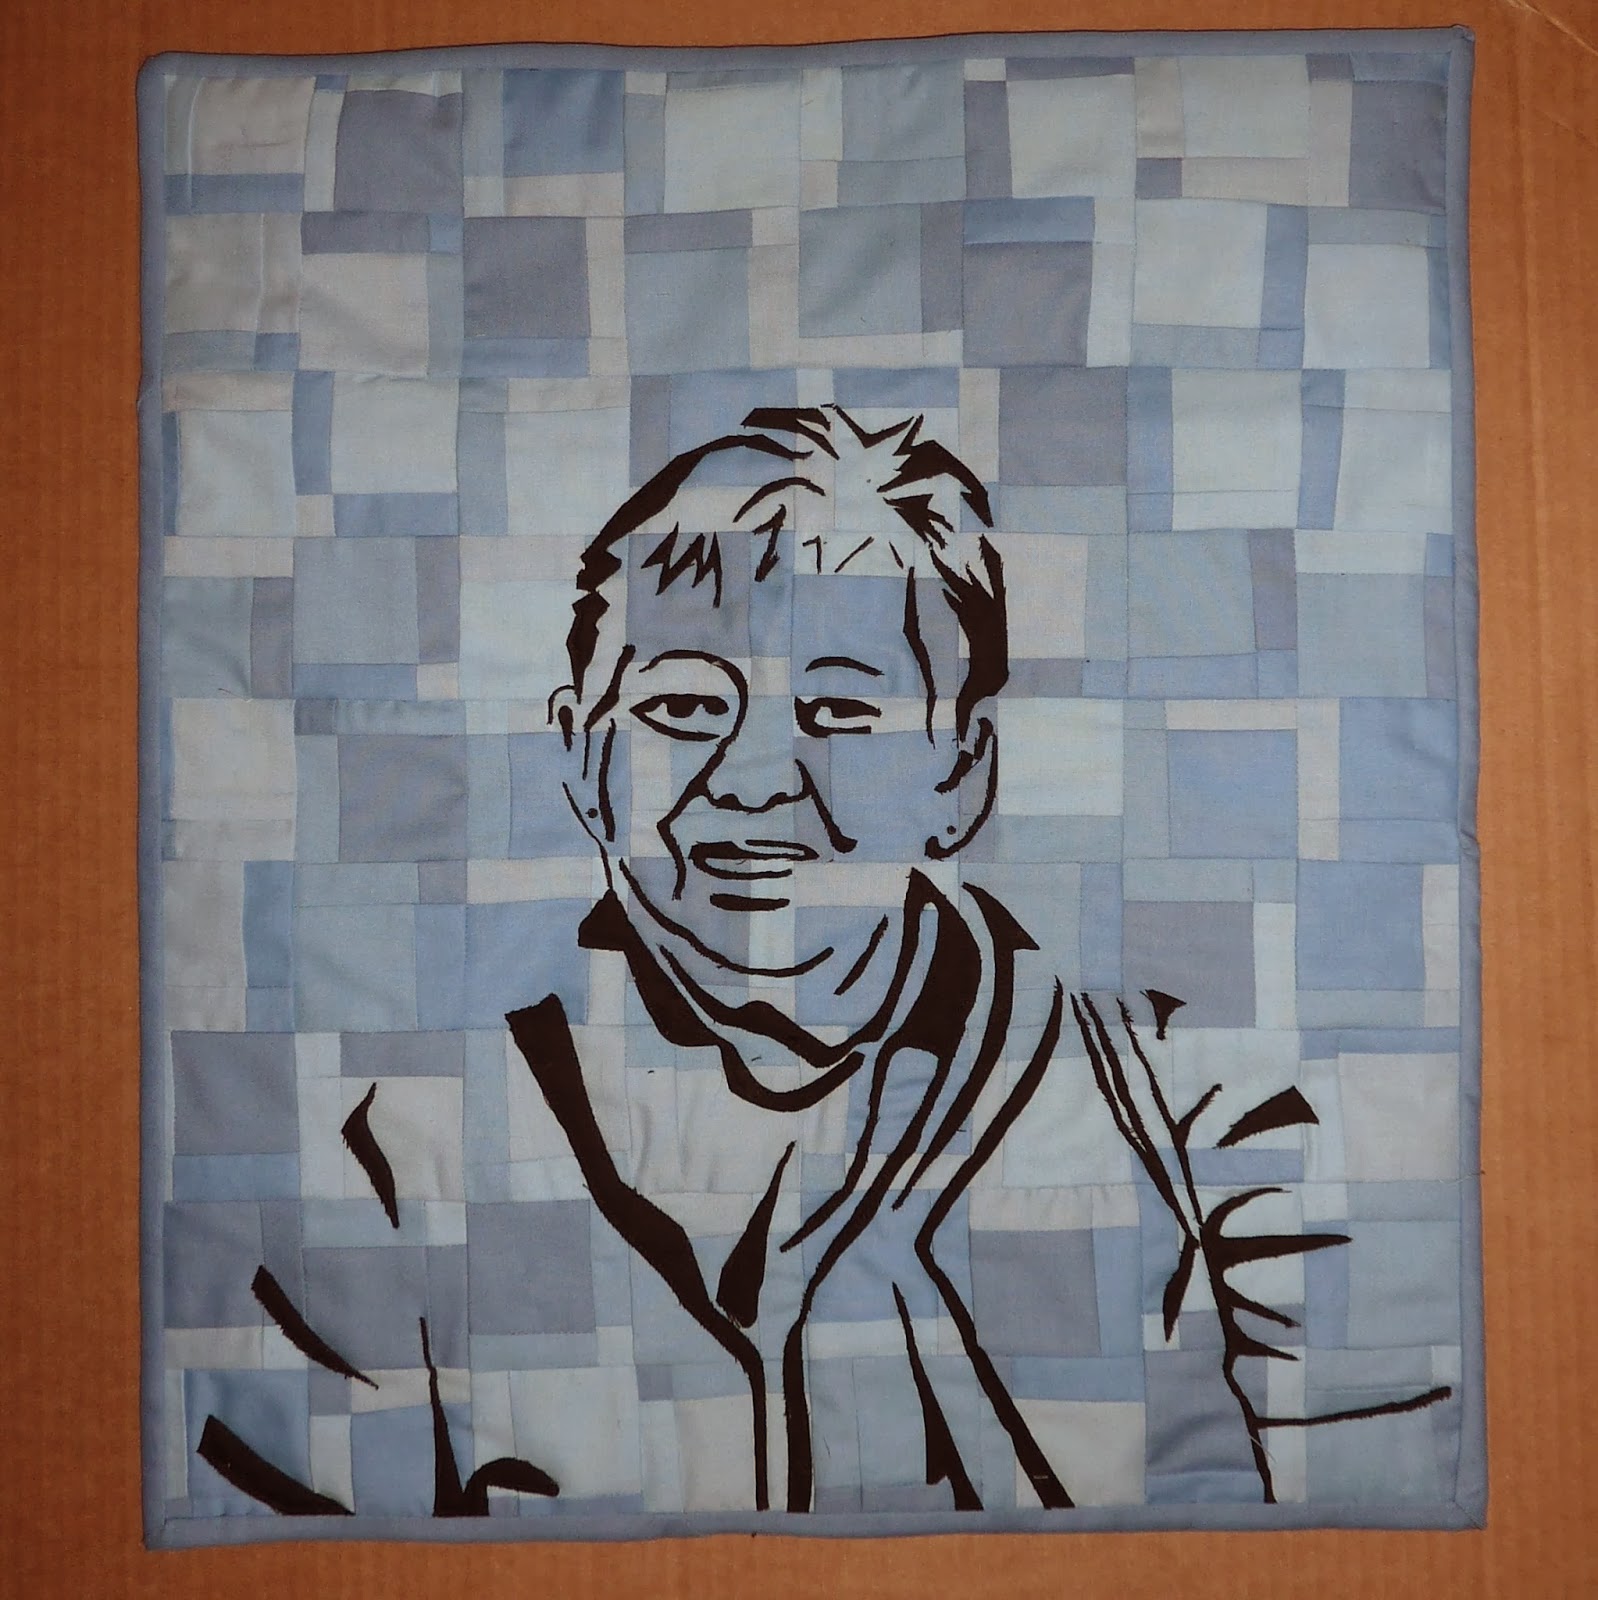
So for Christmas this year I fixed that and here is Mum at Sixtyish:


This one turned out much more open than the one I did of dad, with far less blocks of colour. Partly it was because the photograph was from a bright sunny day (rather than an evening shot) and partly it was because I was trying to make better use of negative space (and get less of a communist propaganda feel to the whole thing!)


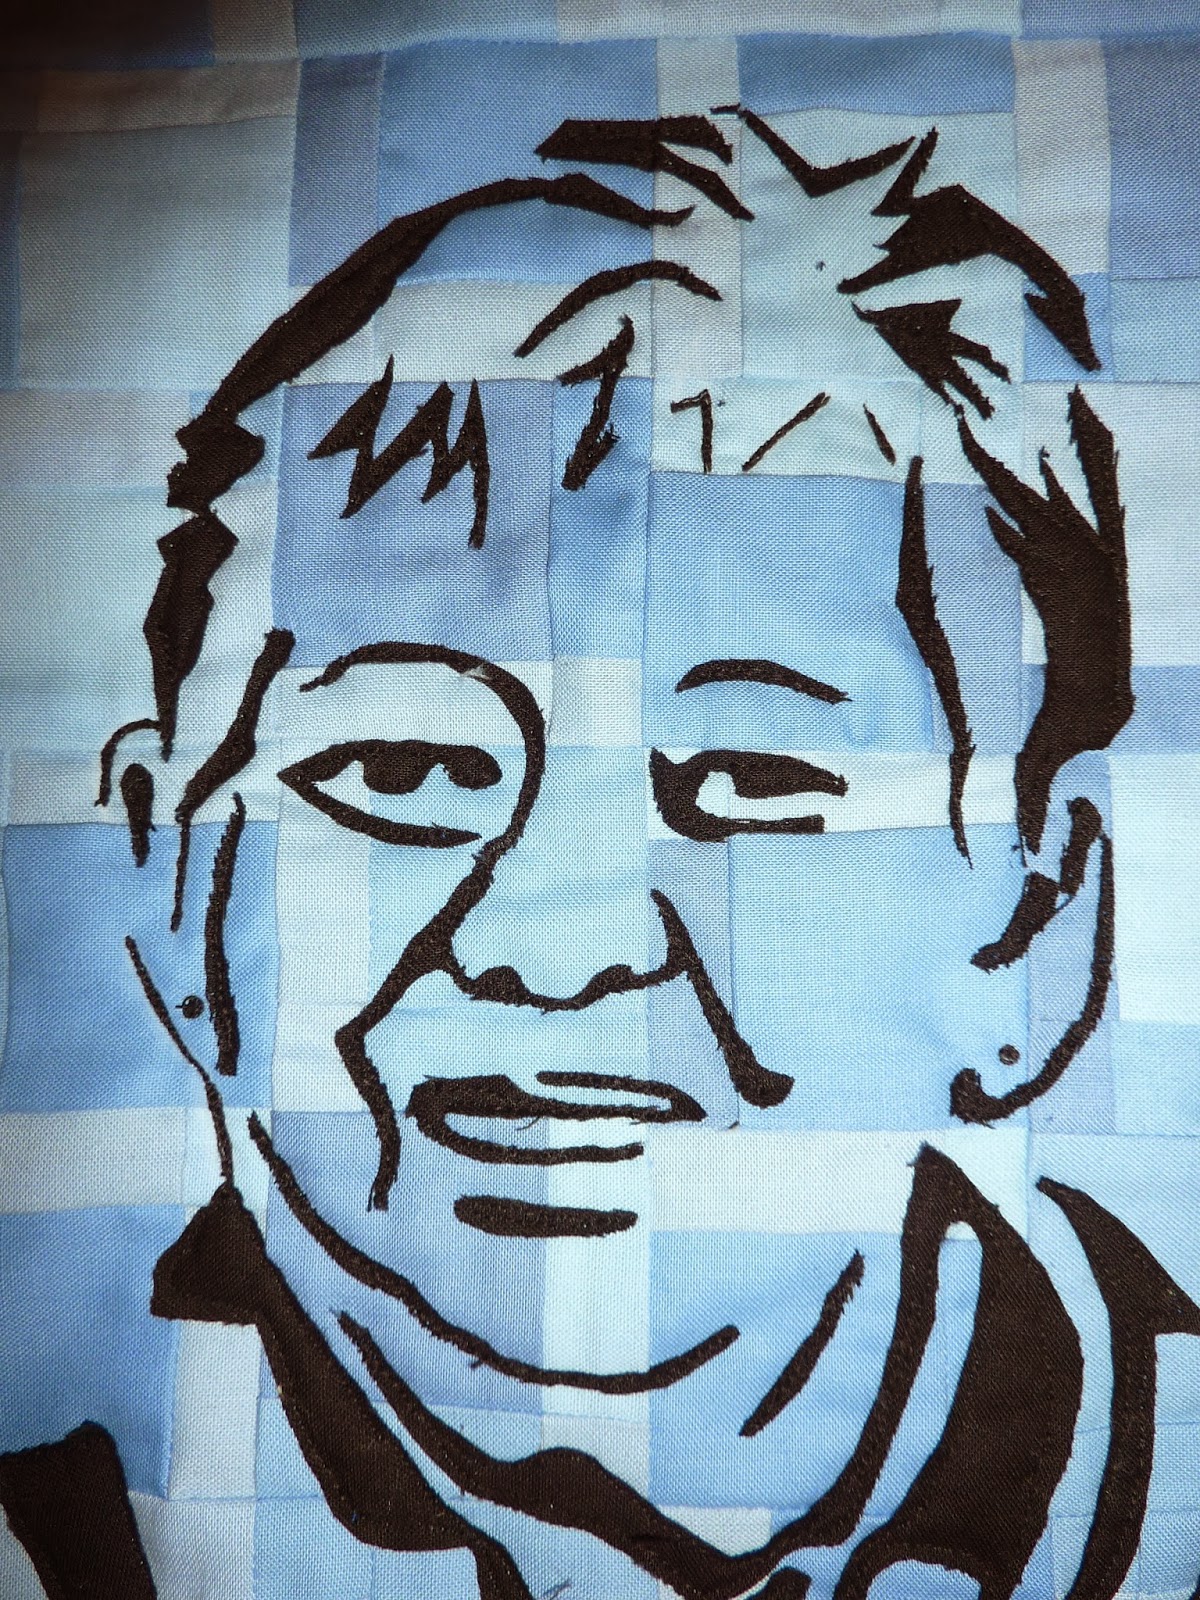
In a close up of the face you can see I used lots of tiny pieces of fabric, some of the very fine detail (left ear, some of the hair) is simply free hand stitching as I couldn't get the fabric slender enough without it fraying.


The quilt is backed with an old duvet cover and has a dowel for hanging


I added a little label because I'm trying to remember to do that more... I think I shall have to try sewing the next one but a marker pen does the job


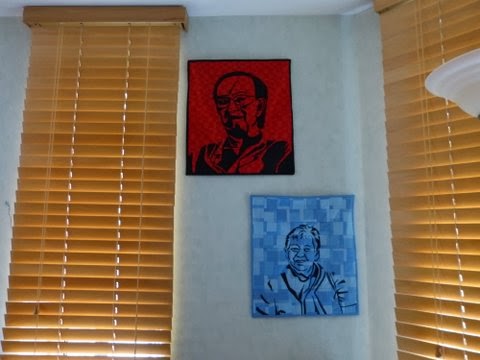
And finally, Mum & Dad on the wall together. I was aiming to get them the same size and whilst the quilts are the same dimensions I appear to have used rather different scales for the portraits. Still, I think they look quite nice together.
 

Sunday, 30 December 2012

Christmas Cards

At Christmas we try to make a trip up to Leeds to see Rob's extended family but this year we realised that it wasn't going to work out.  Because we weren't going to see them we wanted to send a little something up to them so I put together these little trees which we posted as Christmas Cards.  I like to think that they'd make great mug-rugs but I'm having trouble convincing people that it's okay to put dirty things on quilts so I've settled for pretty-little-Christmas-decoration-things!


The trees are all 4x6 finished size and were made with a mixture of techniques - I started by strip-piecing  1.5" strips  (giving 1" finished stripes) of green fabric into a block and then sliced the trees out of the made-fabric.

Next, I pieced the tree trunks into the white 'snow' fabric (2" snow / 1.5" trunk / 2" snow for a 4" finished piece).

Finally, because the angles on the trees were tricky for me to visualise I drafted a foundation piecing template (and copied it several times) and foundation pieced the sky to the trees and then the trunk assemblies onto the bottom to finish.

I added scraps of wadding and cut backing from an old sheet and then free-motion quilted the trees to make them a bit more interesting.  I used white thread throughout to give the effect of snow and all the trees are outlined and have wavy lines in the snow.  The sky portions of each tree were quilted differently to try out various machine quilting patterns - most of the designs came from the Free Motion Machine Quilting Project) with a couple that I made up as I went along.

The trees are bound with a 1.5" straight-cut folded binding which I machined to the front and hand stitched to the back

I bought a pack of blank cards & envelopes from Paperchase and used a craft knife to cut slots 1" in from each corner and then tucked the corners through to hold the trees to the cards.


Tuesday, 8 May 2012

Dad@60 - Construction


This is a more detailled post explaining how I made my Dad@60 quilt.

I started off with this photograph from our holiday to Majorca which, whilst compositionally appalling, had the distinct advantage of being recent and showing dad looking happy and not eating or pulling a silly face!


I started by cropping it down to remove everything except dad.


And then I fired up Inkscape and started to build up my image.  Because I wanted to make this with fabric I didn't outline the features, instead I used blocks of colour to show the shadowed regions and let the features emerge from the white space.  I'd never done this sort of work before so it took me about 4 hours to get an image I was happy with!  The entire image was built using the Bezier Curve/Line tool and the node editor working with a background layer for the photograph and a foreground layer for the picture I was building. It took me several iterations (see below!) to get a "Dad" I was happy with.  Whilst I drew the image entirely in Inkscape I also loaded it up in GIMP where I used the Colour "Threshold" and "Posterise" tools to help me work out where the shadows should go.
1: Jagged Dad
2: Dad-missing-half-his-face
3: Clearer-but-wrongly-lit-dad
4: Final Dad

After I'd got an image I liked I printed him out on A4 paper and started to cut out all the little pieces. I persevered with it to get an idea of what it would look like but it quickly became apparent that several of the pieces were just too small - if I was struggling to cut the paper then there was no way it would work in fabric.


The solution was two-fold, I made the image twice as large and then simplified the shapes a little - in some places I merged unnecessarily complex parts into larger blocks (for example the left shoulder of the shirt) and in others I just simplified the curves so there weren't so many complex cuts needed.


To transfer the image onto fabric I printed it out onto four A4 sheets of freezer paper and cut roughly around the shapes.  I broke the shapes down to make it easier to cut from the fabric and to avoid the dead space that would otherwise exist in the forehead region.  After I had broken the image into pieces I ironed the freezer paper onto the right side of my black fabric, at this point if I had some I would also have ironed fusible web onto the wrong side of the black fabric to make construction easier later on.  Note that whilst I printed all my shapes filled with black it would be far more intelligent to un-fill the shape and just print the outline! The next step was to carefully cut out the fabric pieces to exactly match the freezer paper templates attached to them.  I left the freezer paper on for as long as possible to help stop the fabric fraying.  


I made a quilt sandwich using a fat quarter of background fabric (Checks by Sandy Gervais for Moda from the Merry & Bright collection) with wadding (needle punched cotton of some sort) and backing (part of a cheap duvet set) held together with 505 spray and carefully arranged all the pieces using a small printout of my image as a guide to get everything in the right place.  If I had been clever and just printed the outlines I would have numbered all the pieces so I didn't have to puzzle out how they fitted back together!


At this point if I had used fusible web I would just have ironed everything in place, Since I didn't have any I lifted each piece in turn, sprayed the back with 505 spray and stuck it back into position.  

I didn't take any pictures of the sewing (oops) but I started at the bottom left, carefully removed the freezer paper from the first piece (without detaching the fabric from the backing!) and then used free-motion appliqué to sew it down securely.  I repeated this process to secure all the pieces - it was a little fiddly in places but I think it was actually easier than free motion quilting; black thread on black fabric is very forgiving of the occasional wobble.

Once all the pieces were stitched down I measured from the outside of each shoulder to determine the width of the piece (16 inches) and then picked a height which gave the right amount of space above his head (18 inches).  All that remained was to square the quilt up and bind it.


  I added Fast Finish Triangles on the back (a technique from Terry Chilko) and a little label to commemorate the event!


 At the top you can see a dowel which is tucked into the two corner triangles, the quilt is hung by resting the dowel on a nail or screw in the wall


I didn't really go into the detail of how to make the black and white image from a photograph because I don't feel confident explaining something I've only done once!  I found these tutorials / images useful:

Tutorial - using photshop to make a vector portrait from an image (I didn't actually make mine this way but I found it useful for getting the idea of how shadows work!)
Image - Hendricks Vector (a very nice black & white Jimmy Hendricks portrait)

Photoshop and Illustrator appear to be the tools of choice for this sort of work (and the ones used in all the tutorials I could find) but they are pretty expensive; GIMP and Inkscape are free and do pretty much the same job so I used them instead!
Friday, 4 May 2012

Dad@60


I made this quilt for Dad's 60th Birthday and I couldn't be happier with it.  It's the first time I've ever made any thing like this and amazingly the entire process went smoothly from start to finish.

Whilst I have always admired the art quilts I've seen online and at shows, this quilt was particularly inspired by the work of Luke Haynes, an American quilt artist who makes some stunning contemporary quilts.  I've wanted to make a more "arty" quilt for a quite a while now but always felt hampered by my extreme lack of artistic talent (I'm awful at drawing etc), but the other day Rob was doing some illustrating on the computer and he showed me how he was using different image layers to trace the outlines of his drawing from a photograph.  It looked like something I might be able to do and it turns out it is!

I'll keep this post fairly short but I have put together a (fairly) complete description of how I made the quilt here.


Sunday, 25 March 2012

Scrappy Zappy Do

A somewhat belated post introducing my birthday project - this year we went to Jennie Rayment's Scrappy Zappy Do workshop and made some gorgeous wall hangings. The rolled edges of the segments reminded me of autumn leaves curling on the ground so I picked autumnal colours and made this little beauty 


Monday, 12 December 2011

Winter Trees

We put the Christmas tree up last weekend and to celebrate I made this little wall hanging; Rob had been talking about going out to a farm near his parents house to choose their tree when he was a kid so I like to see this as a field of Christmas Trees just waiting to be taken into the house and decorated.


The tree design was inspired by these trees made by Tanya